Mixing Metal Vocals with ONLY PLUGINS
Screamed metal vocals are tough to nail because they occupy the same frequency range as your guitars, bass, snare, cymbals, pads, and pretty much everything else. All those instruments elbow each other to stand out in your mix.
But of course, it’s far from impossible. Here is a plugin chain you can use to achieve professional-grade metal vocals in a home studio mix.
Pre-amp
Slate Virtual Mix Rack has a good pre-amp plugin that delivers color that’s almost imperceptible, but really adds up in the context of what comes next. I like to use the “N” setting, which emulates a Neve pre-amp, dialed to a reasonably hot input level.
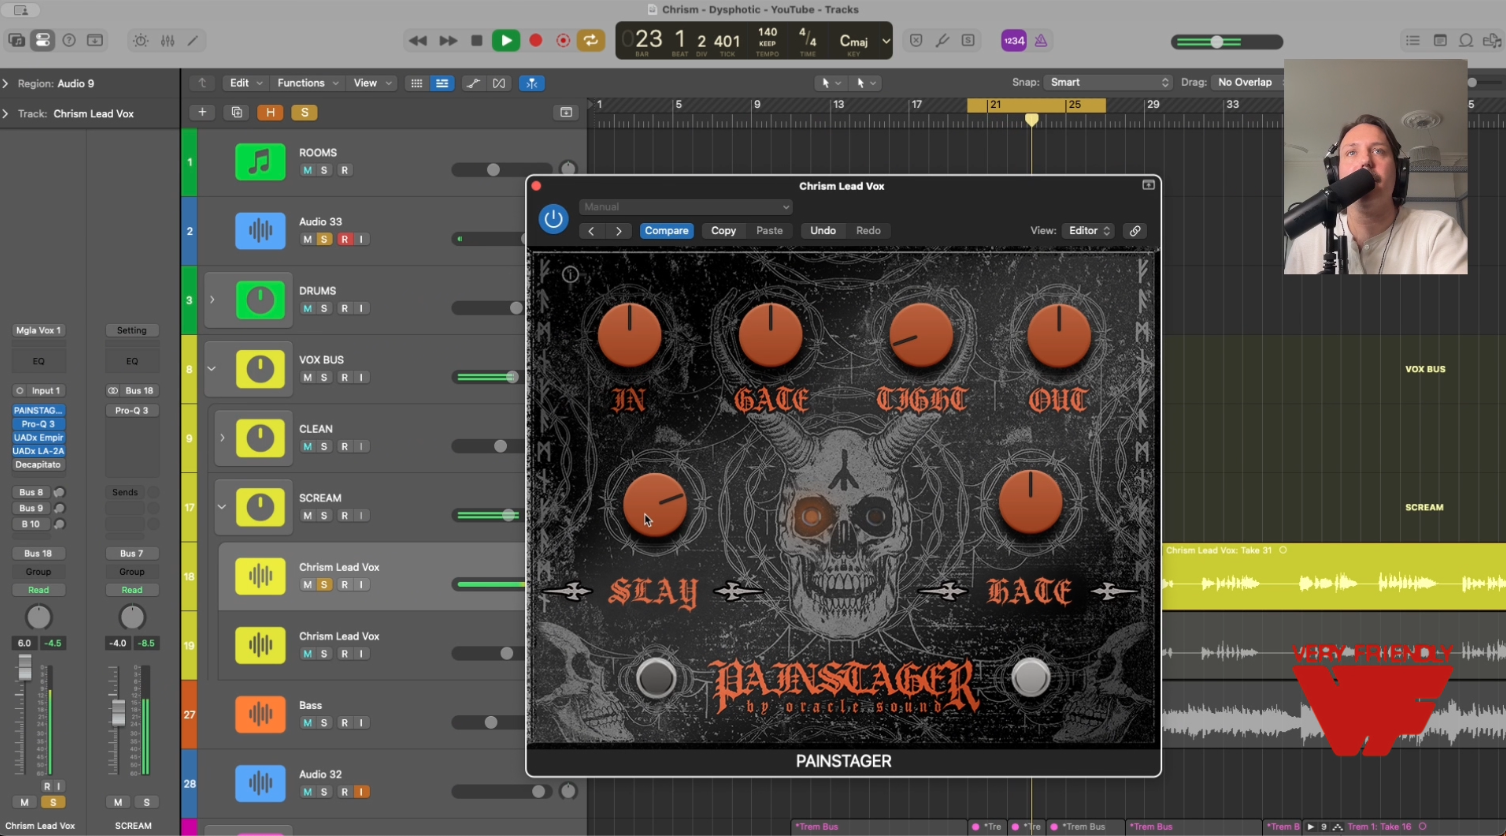
That said, don’t be scared to throw a trusty HM-2 plugin on there. Who cares! I like PAINSTAGER for this. It gives you a sound you’ll immediately identify as heavy.
EQ
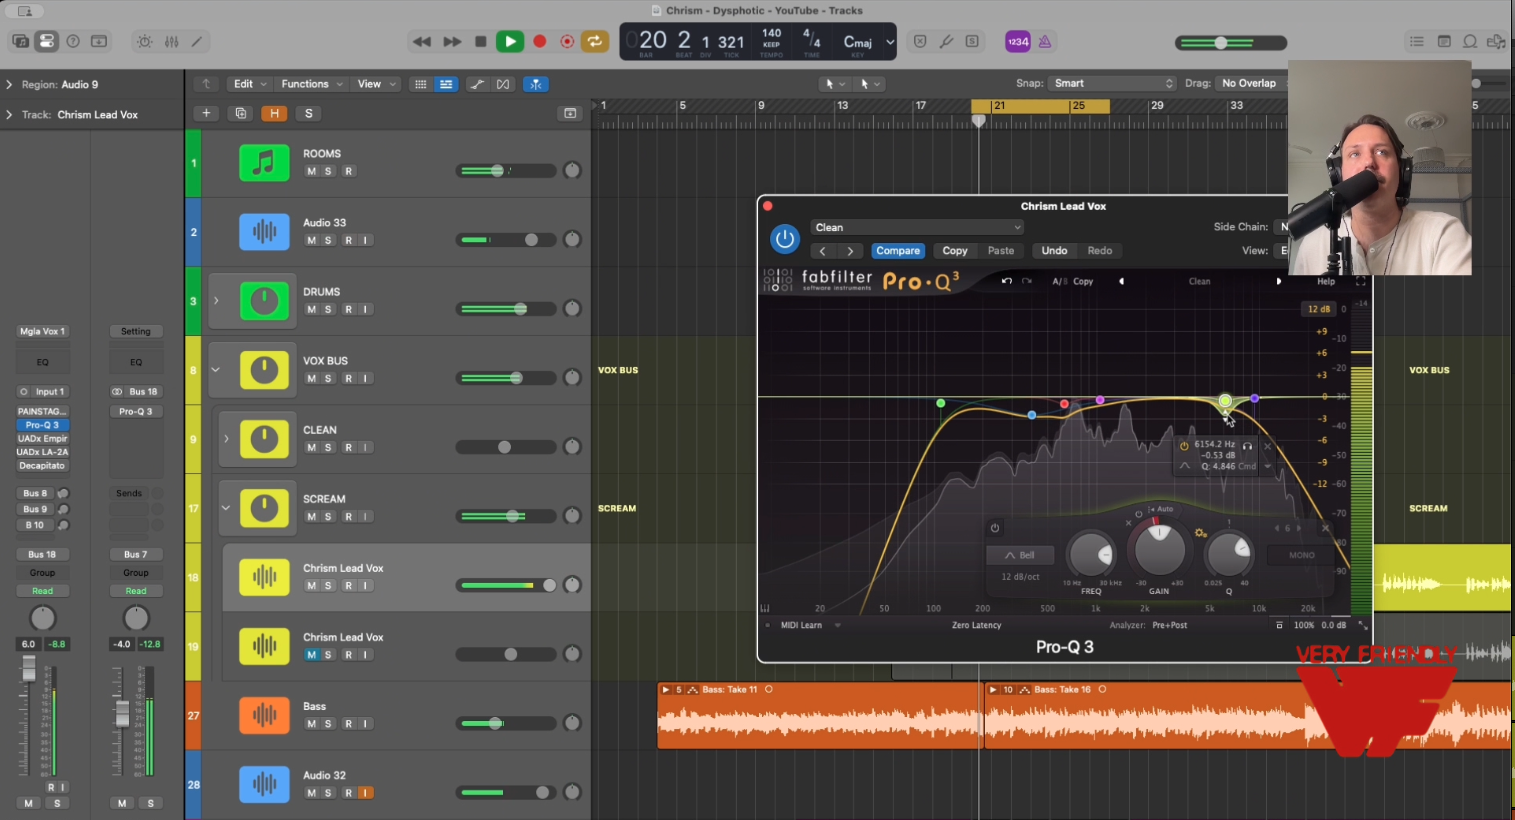
Pro-Q 3 is the best-of-breed visual EQ, and I like to be very gentle with it. Cut out low end (80-120Hz), add a dip on the mud (somewhere in 200-500Hz), and cut the boxy frequencies at around 500-700Hz. Add a dynamic EQ dip on the sibilants (S and T sounds around 8k), and put a nice low pass to clear room for your guitars and cymbals (8K-13K).
Compression
We like two-stage compression for this particular purpose.
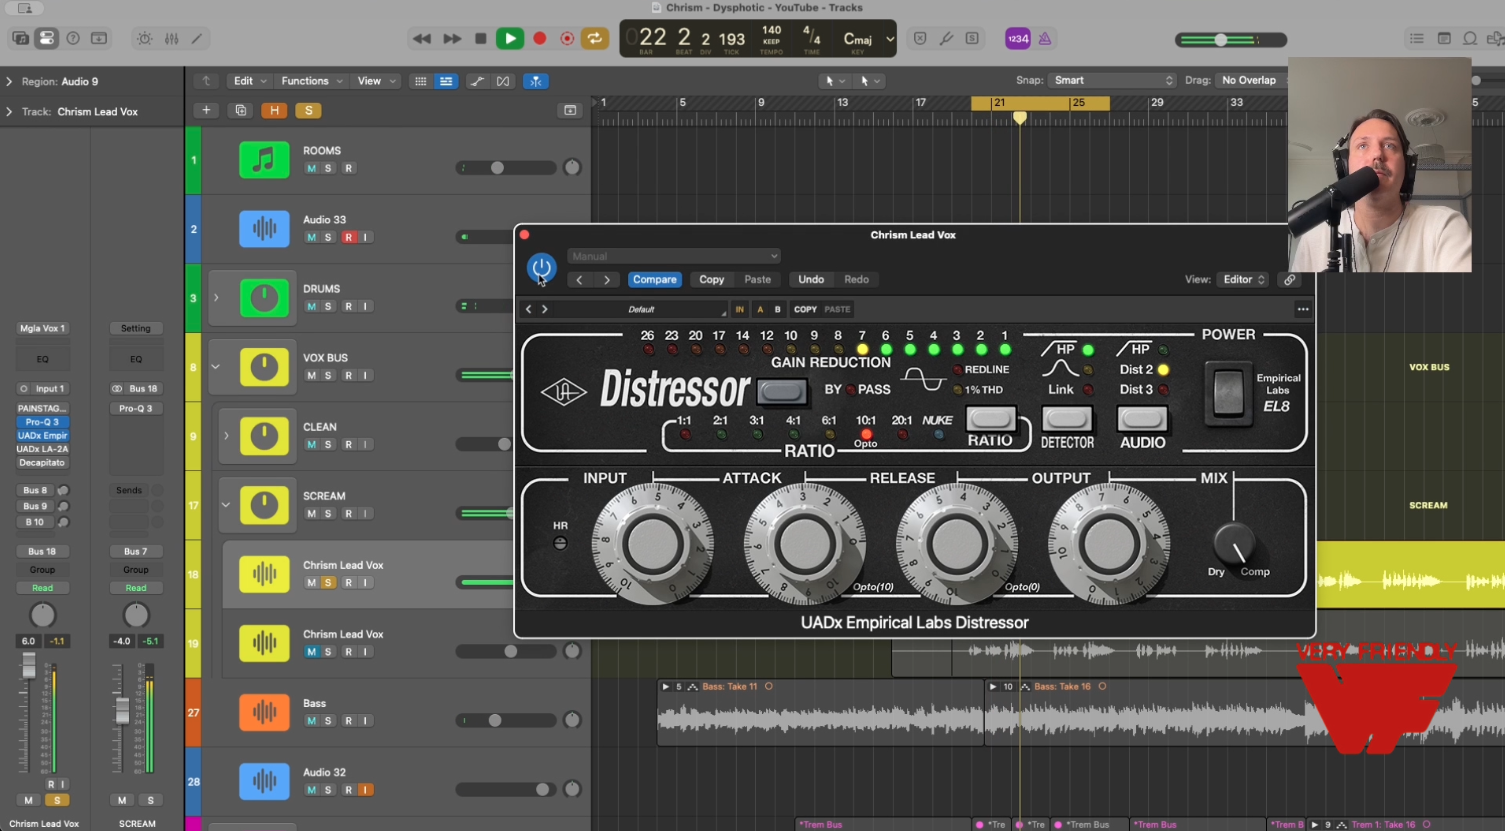
First, try Distressor or 1176. Slam this one. I like to hit it really hard to bring out the grit, with 12-14 db of gain reduction, at a ratio of 4:1 or above (sometimes 10:1; again, who cares! See if it sounds good.)
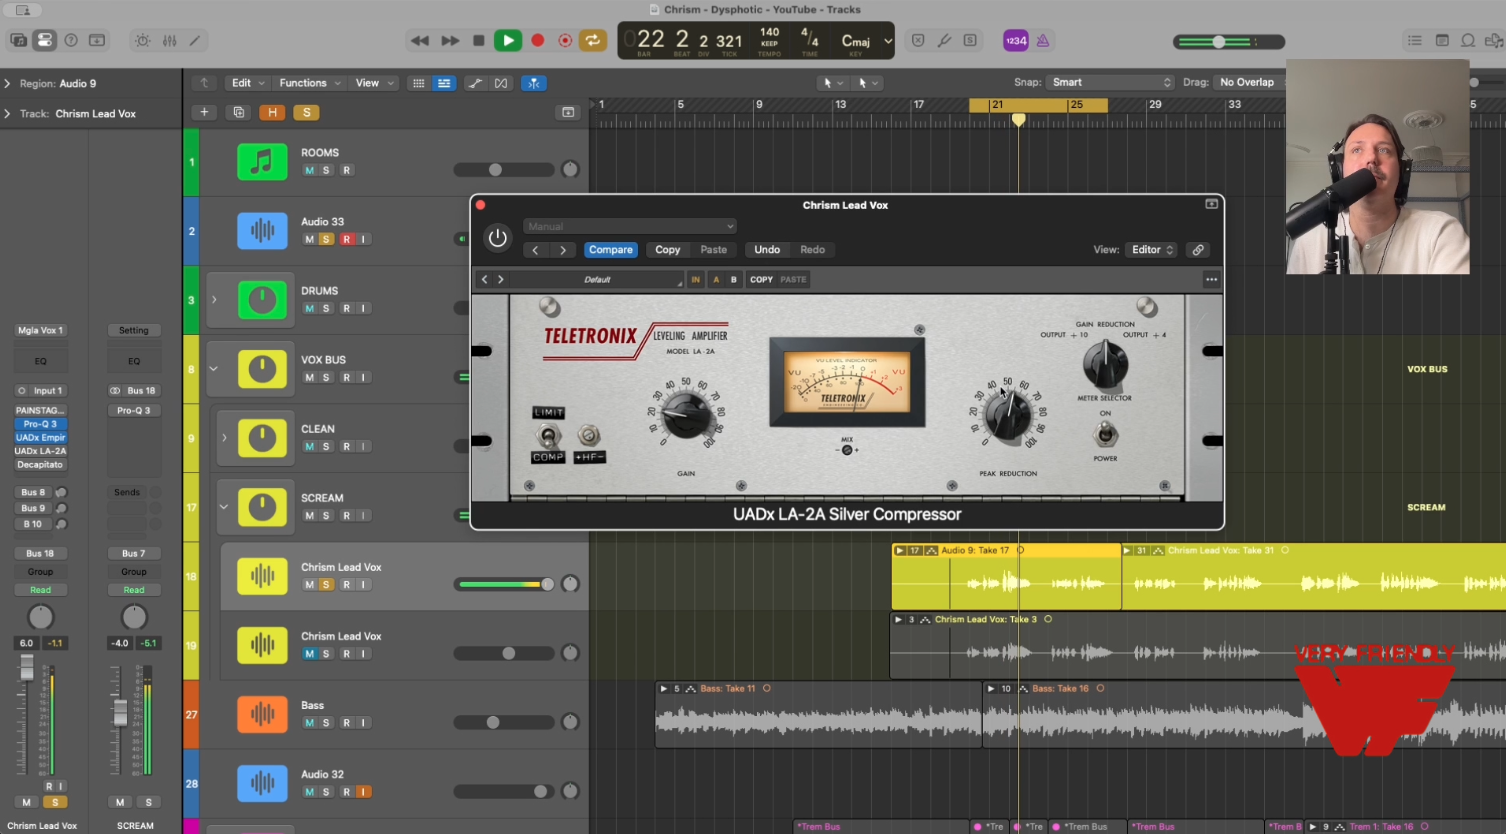
Then, LA-2A, just for color and glue. This is, funnily enough, the same two-stage compression that Charli XCX uses. It’s ideal for screams.
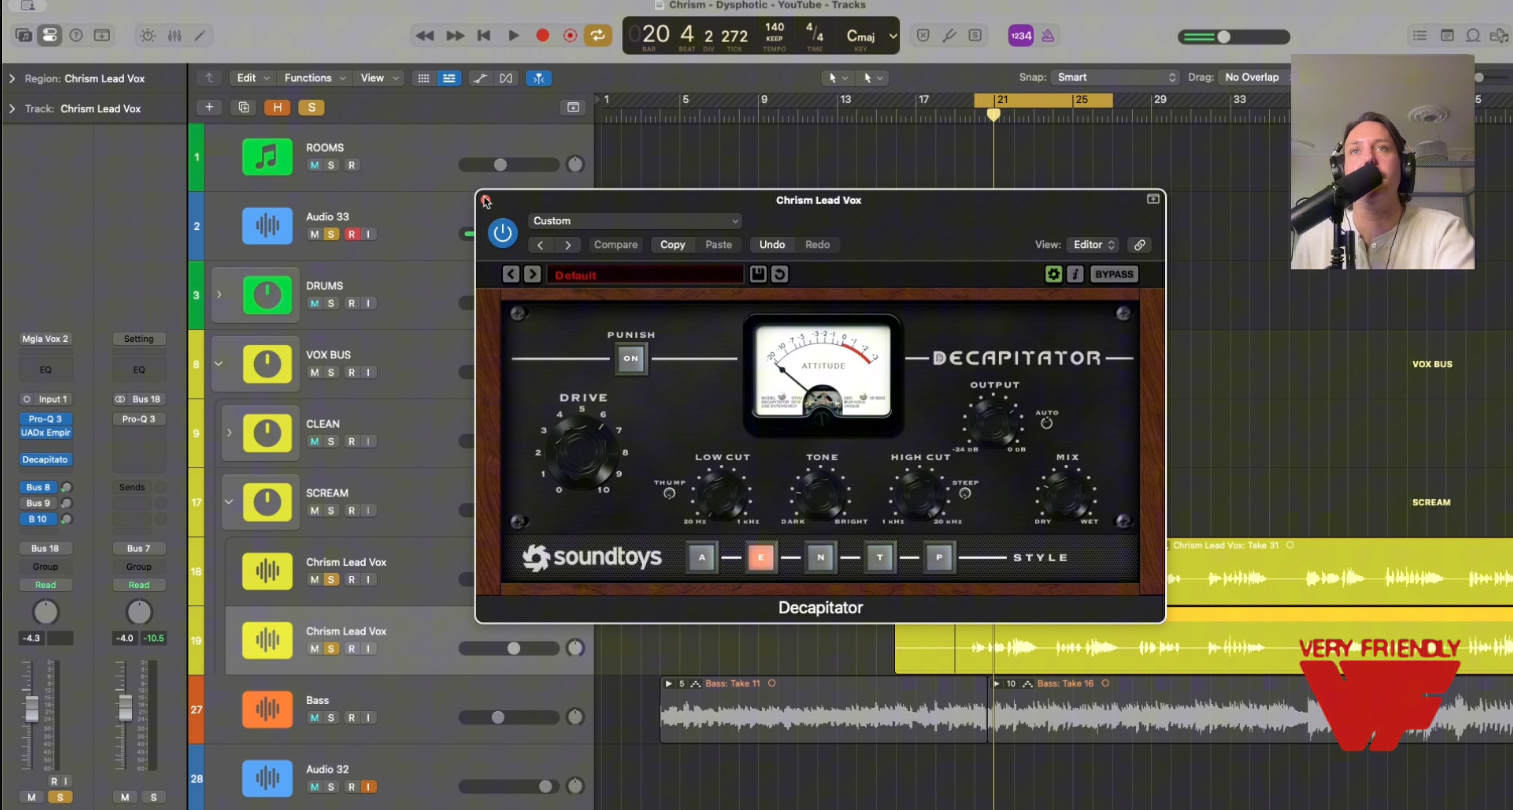
Saturation
If you DIDN’T use HM-2 earlier (or even if you did, no rules) you can kiss the track with gentle saturation using Decapitator, Blackbox, or even tape saturation.
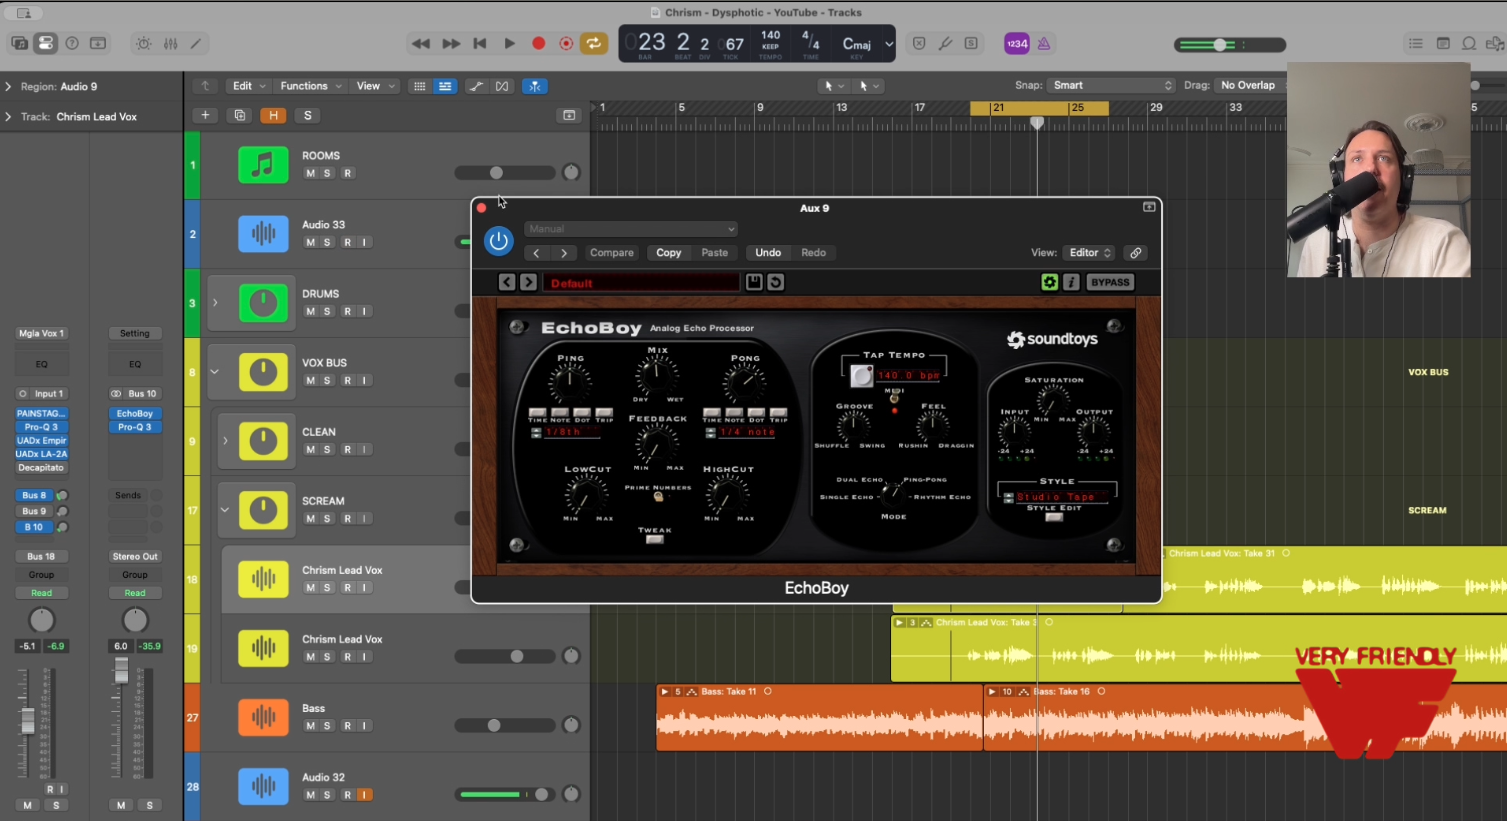
wet fx and buses
Use two auxiliary sends, one for reverb (Echoboy) and one for delay (Valhalla Delay). I like to keep these OFF the actual track and use an aux send to give me wet/dry dialing options.
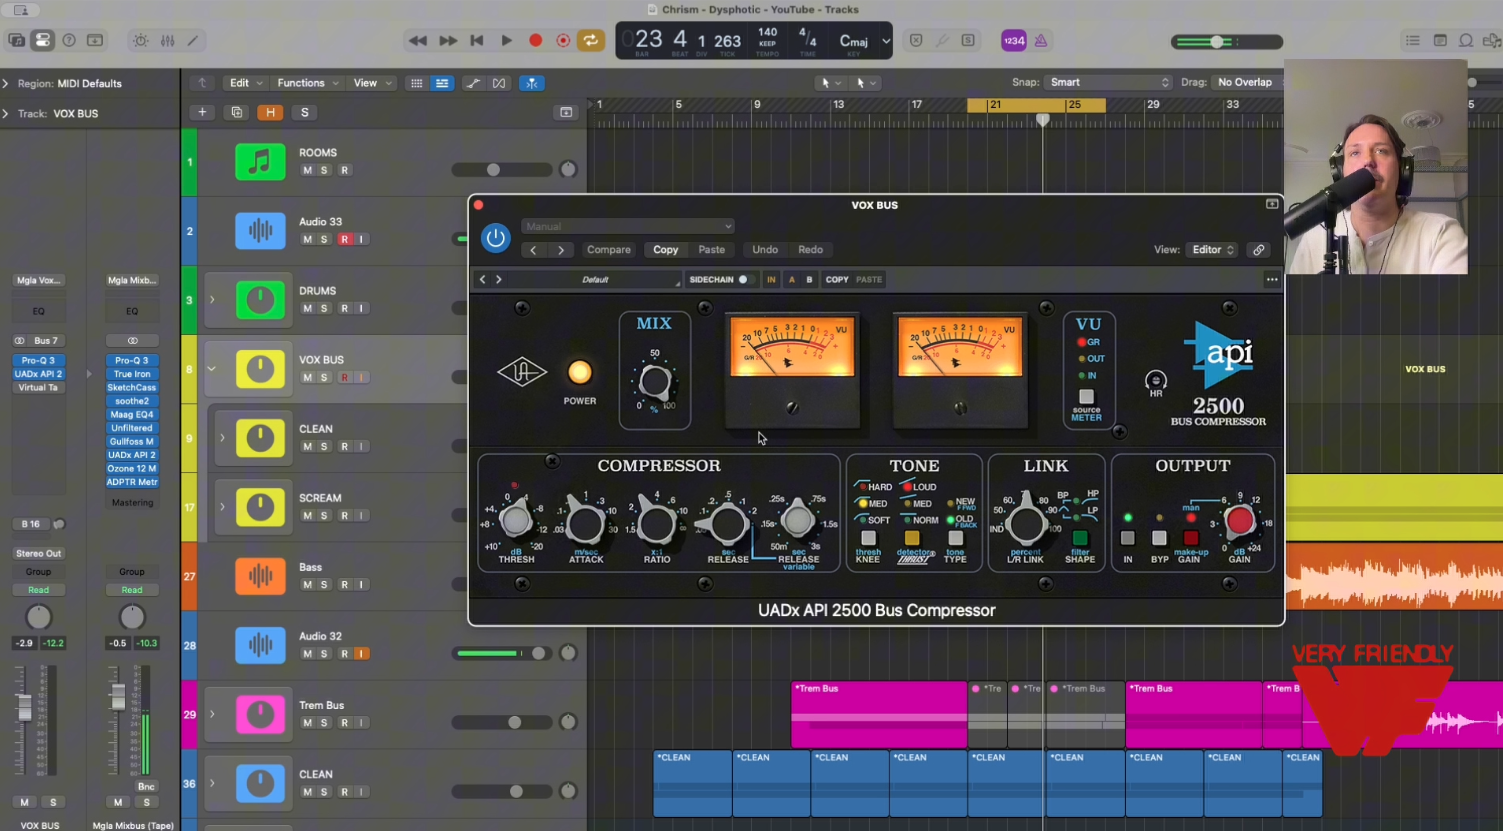
On the bus, we use API 2500, our favorite bus compressor. Use a fast-ish attack (.1-.3s), the fastest possible release, a 3:1 or 4:1 ratio, and 1-2 db of gain reduction.
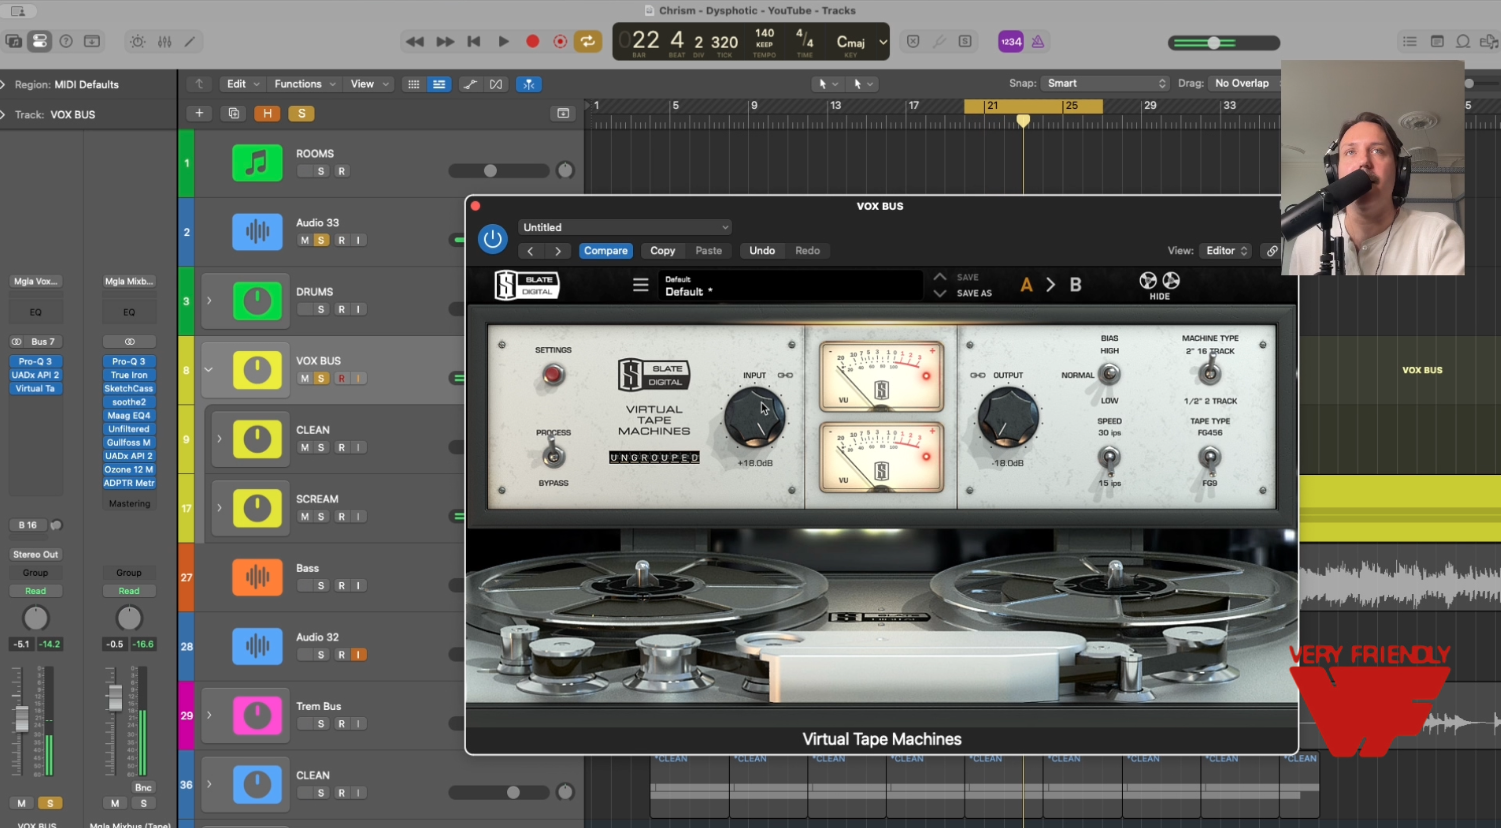
We also add saturation on the bus, specifically a tape saturation plugin, which almost never fails to glue vocals.
We hope you found this useful! If you prefer a video option, here’s the chain breakdown over on our YouTube.