My single favorite plugin: tape saturation
Compression and EQ get a ton of airtime, but almost nobody talks about tape saturation. To me, this is insane, because I think tape saturation has the greatest capacity to make songs sound amazing with a single click.
Tape saturation adds harmonic content, softens transients, and glues frequencies together in a way that EQ and compression simply cannot replicate. It's not a subtle effect when you know what to listen for, and it just makes your shit sound better.
I use two tape plugins constantly: Aberrant DSP's Sketch Cassette 2 for lo-fi cassette character, and Slate Digital's Virtual Tape Machines (VTM) for studio-grade reel-to-reel saturation. Different tools, different jobs. Here's how I use them.
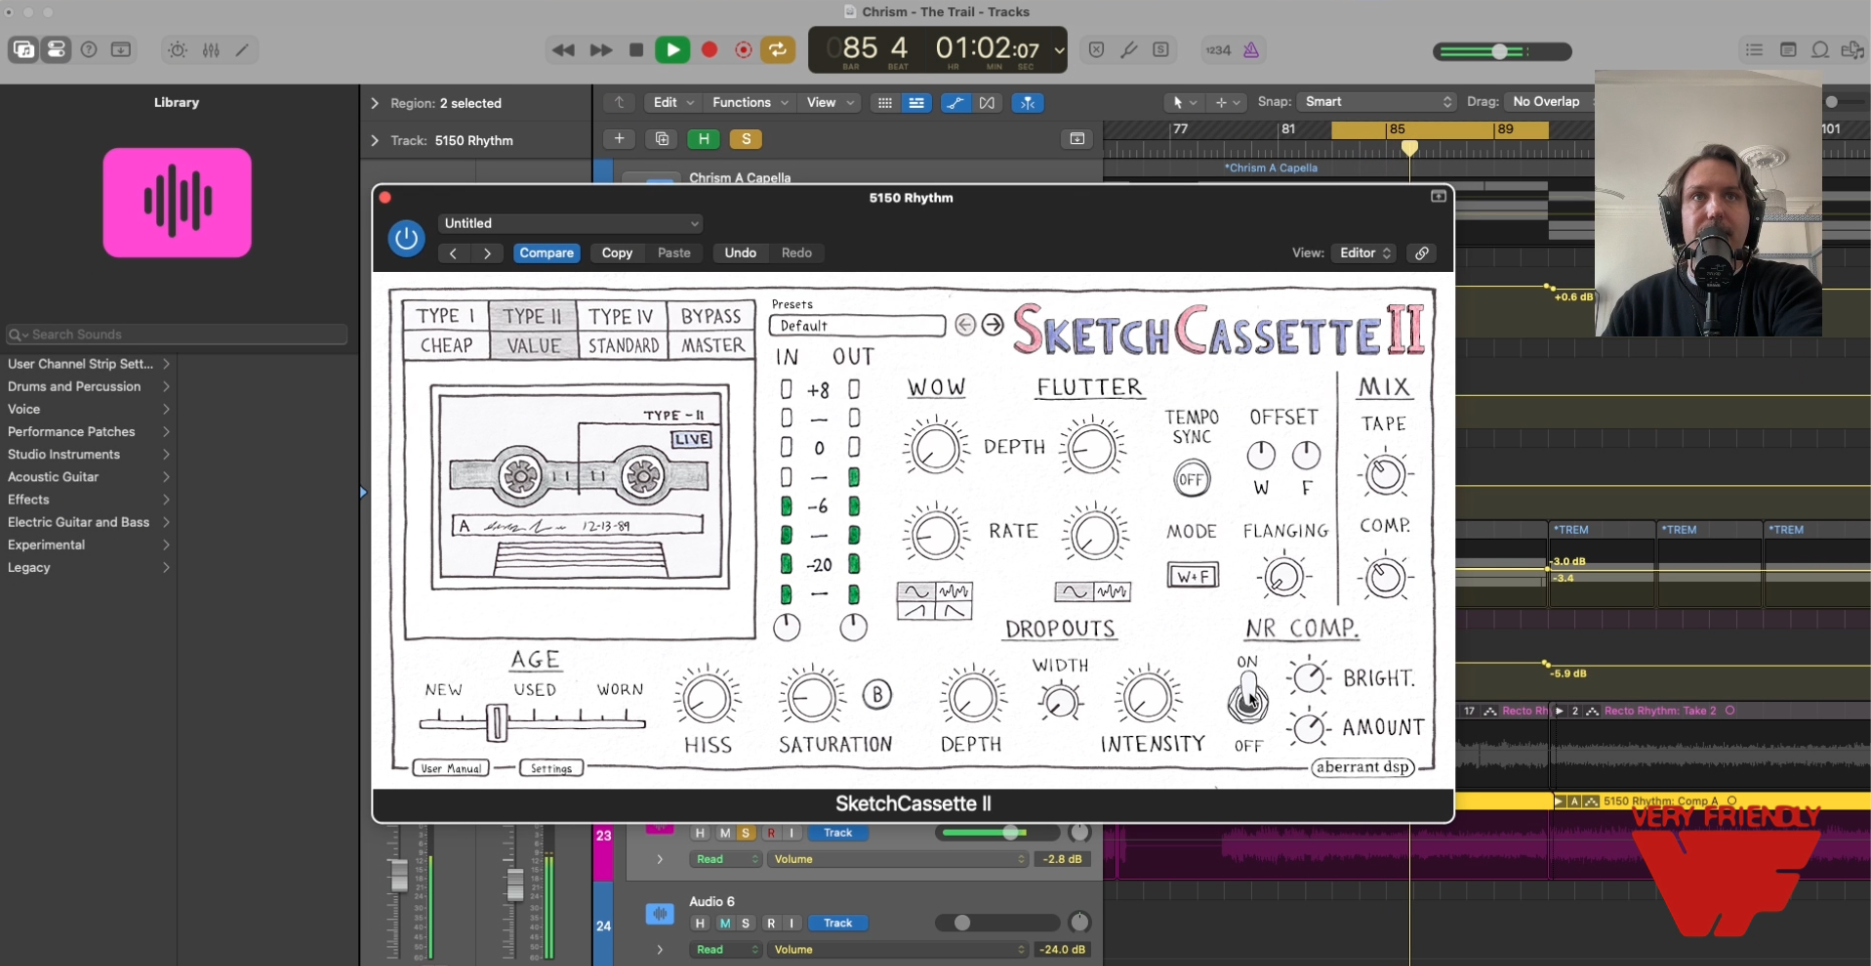
Sketch Cassette 2: The Settings
Tape Types — Different cassette formulations with different frequency responses and saturation characteristics; pick the one that fits the vibe.
Tape Age — Simulates worn, degraded tape; crank it for lo-fi destruction, keep it low for subtle warmth.
Hiss — Adds authentic tape noise; sometimes you want it for texture, sometimes you kill it entirely.
Saturation — Controls harmonic density and soft clipping; more saturation = more grit and natural compression.
Wow — Slow pitch wobble like a warped cassette; subtle settings add organic movement, extreme settings get seasick.
Flutter — Fast pitch variation; adds shimmer and instability to the high end.
Dropouts — Simulates moments where the tape loses contact with the head; instant lo-fi chaos when you want it.
NR Comp — Emulates the compression artifacts from noise reduction systems like Dolby; adds a pumping, squashed character.
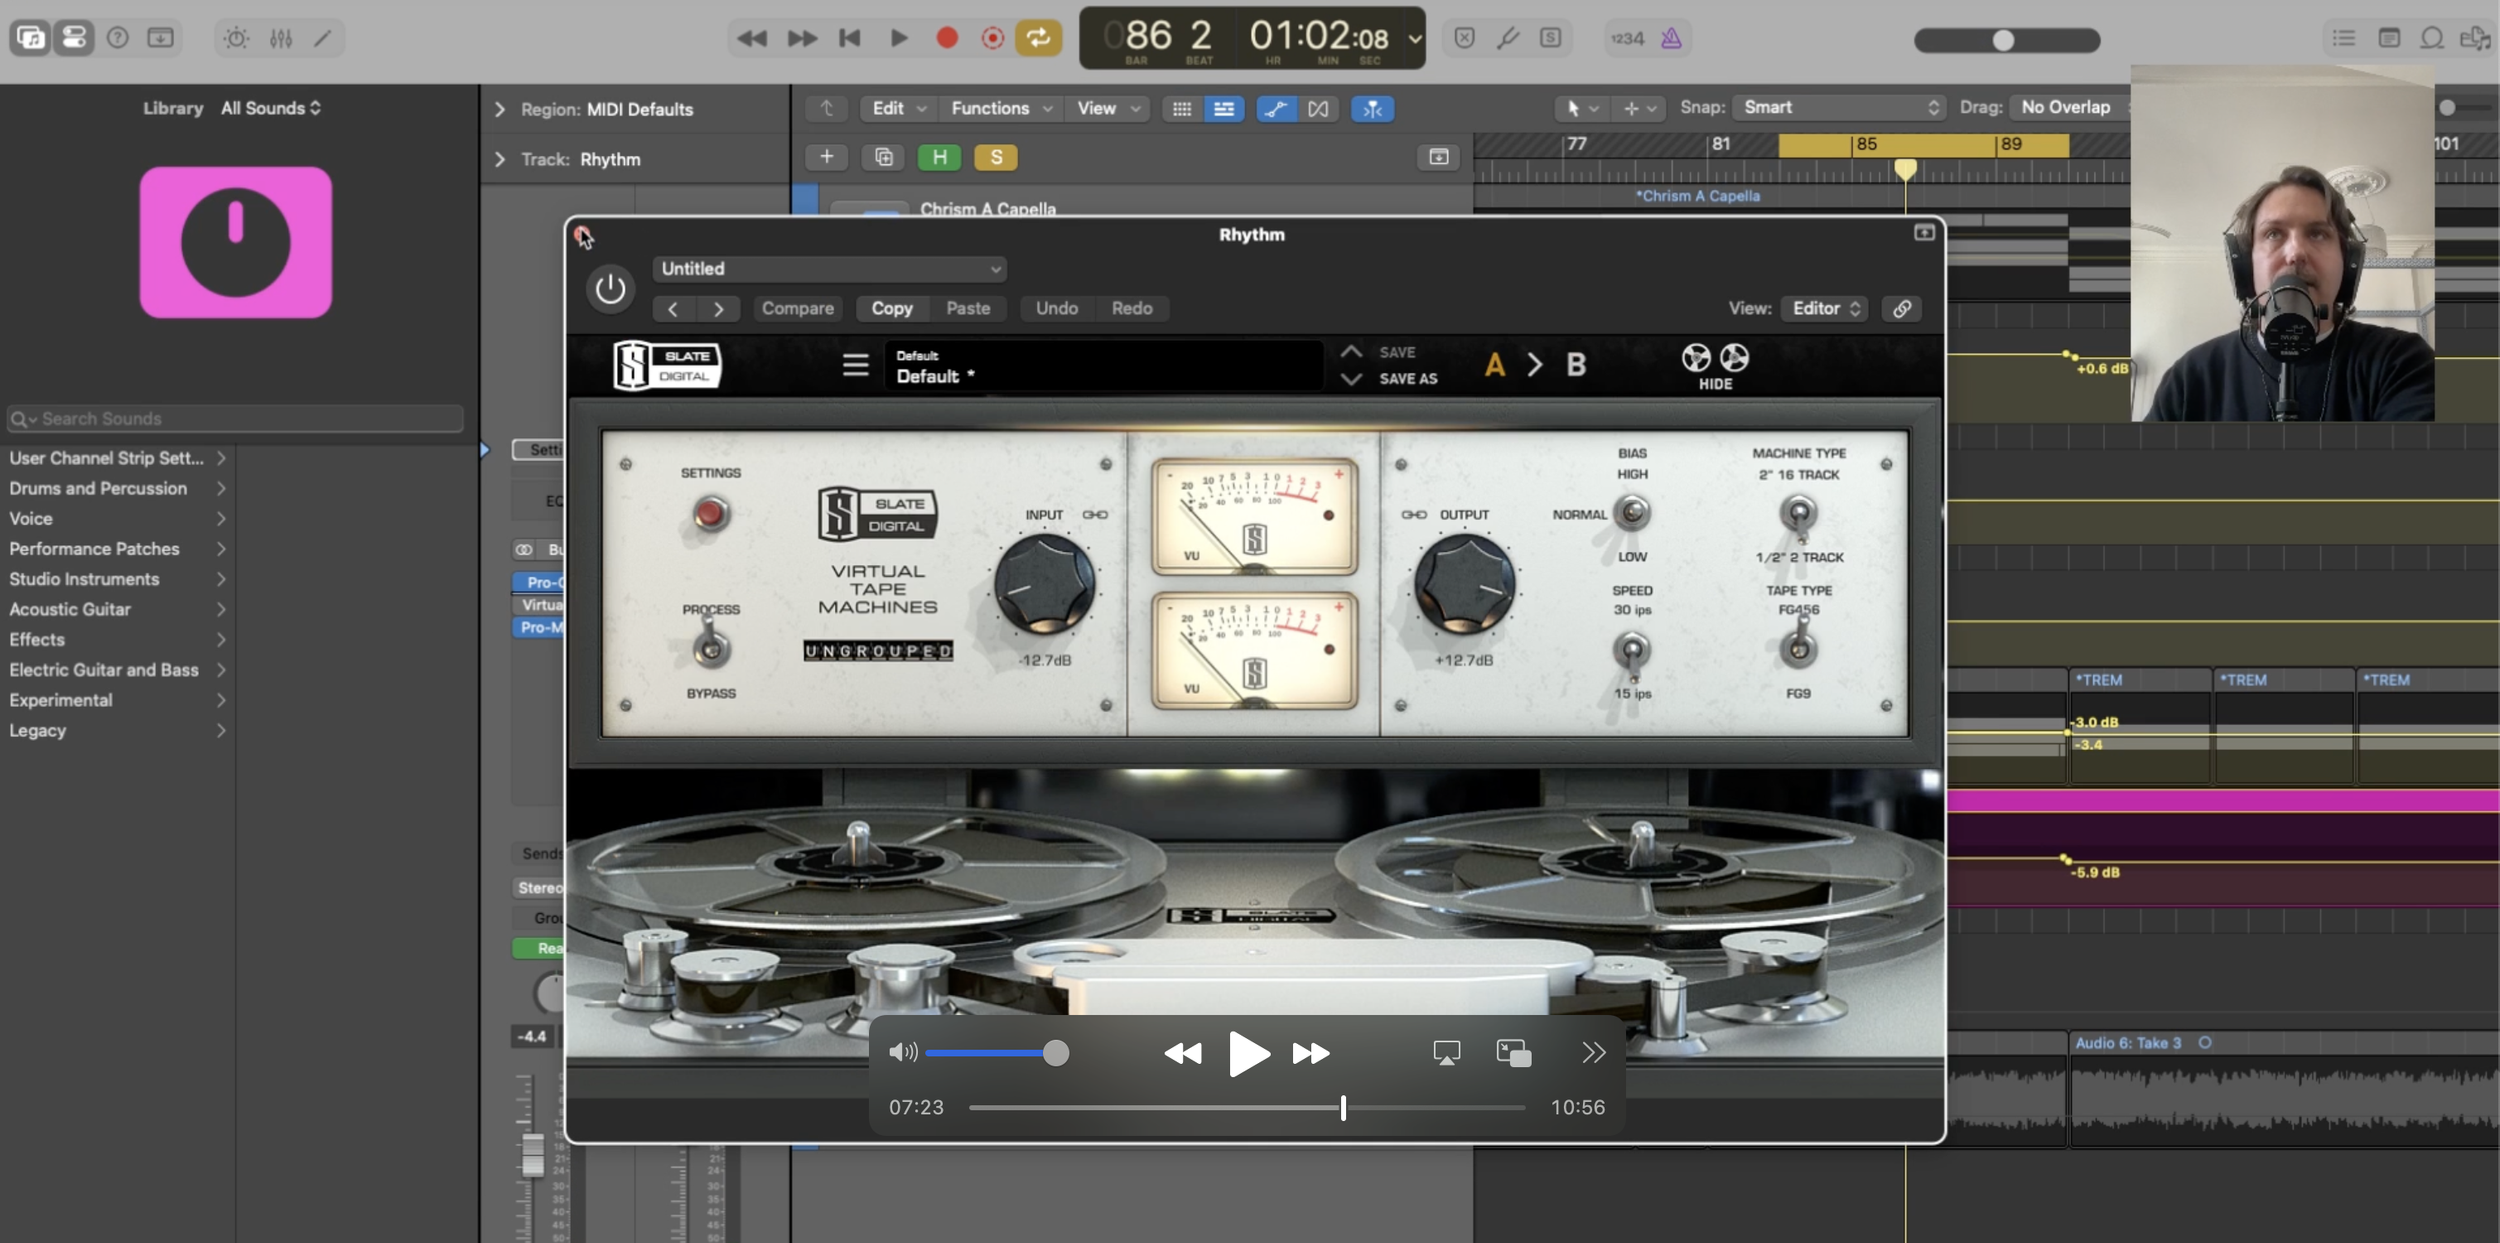
Slate Virtual Tape Machines: The Settings
VTM emulates two classic studio reel-to-reel machines — a punchy American 16-track and a warm British 2-track. It's less about destruction, more about polish.
Machine Type — Choose between the two emulations; the American machine is punchier, the British machine is smoother and warmer.
Tape Speed — 15 IPS is warmer with more low-end bump; 30 IPS is tighter and more transparent.
Bias — Affects the saturation character and frequency response; under-biasing adds brightness and edge, over-biasing smooths things out.
Input Level — How hard you drive the tape; push it for saturation and compression, back it off for subtle sheen.
Tape Formula — Different formulations with varying saturation curves and frequency responses.
Bass Align — Fine-tunes the low-end bump that tape heads naturally produce.
On Individual Guitar Tracks: Vintage Feel and Ferocity (Sketch Cassette 2)
This is where Sketch Cassette 2 earns its keep. On individual guitar tracks — especially distorted rhythm guitars — tape saturation adds a layer of harmonic ferocity that amp sims alone can't deliver.
Try Type II or Type IV tape on guitar tracks.
On the Guitar Bus: Polish and Punch (Slate VTM)
Once the individual tracks have their character, I use Slate VTM on the guitar bus to glue them together. Push the input a little and the saturation tightens up the low mids, making the guitars feel like a wall.
Here are the settings I like.
On the Drum Bus: Crack, Sheen, and Sizzle (Sketch Cassette 2)
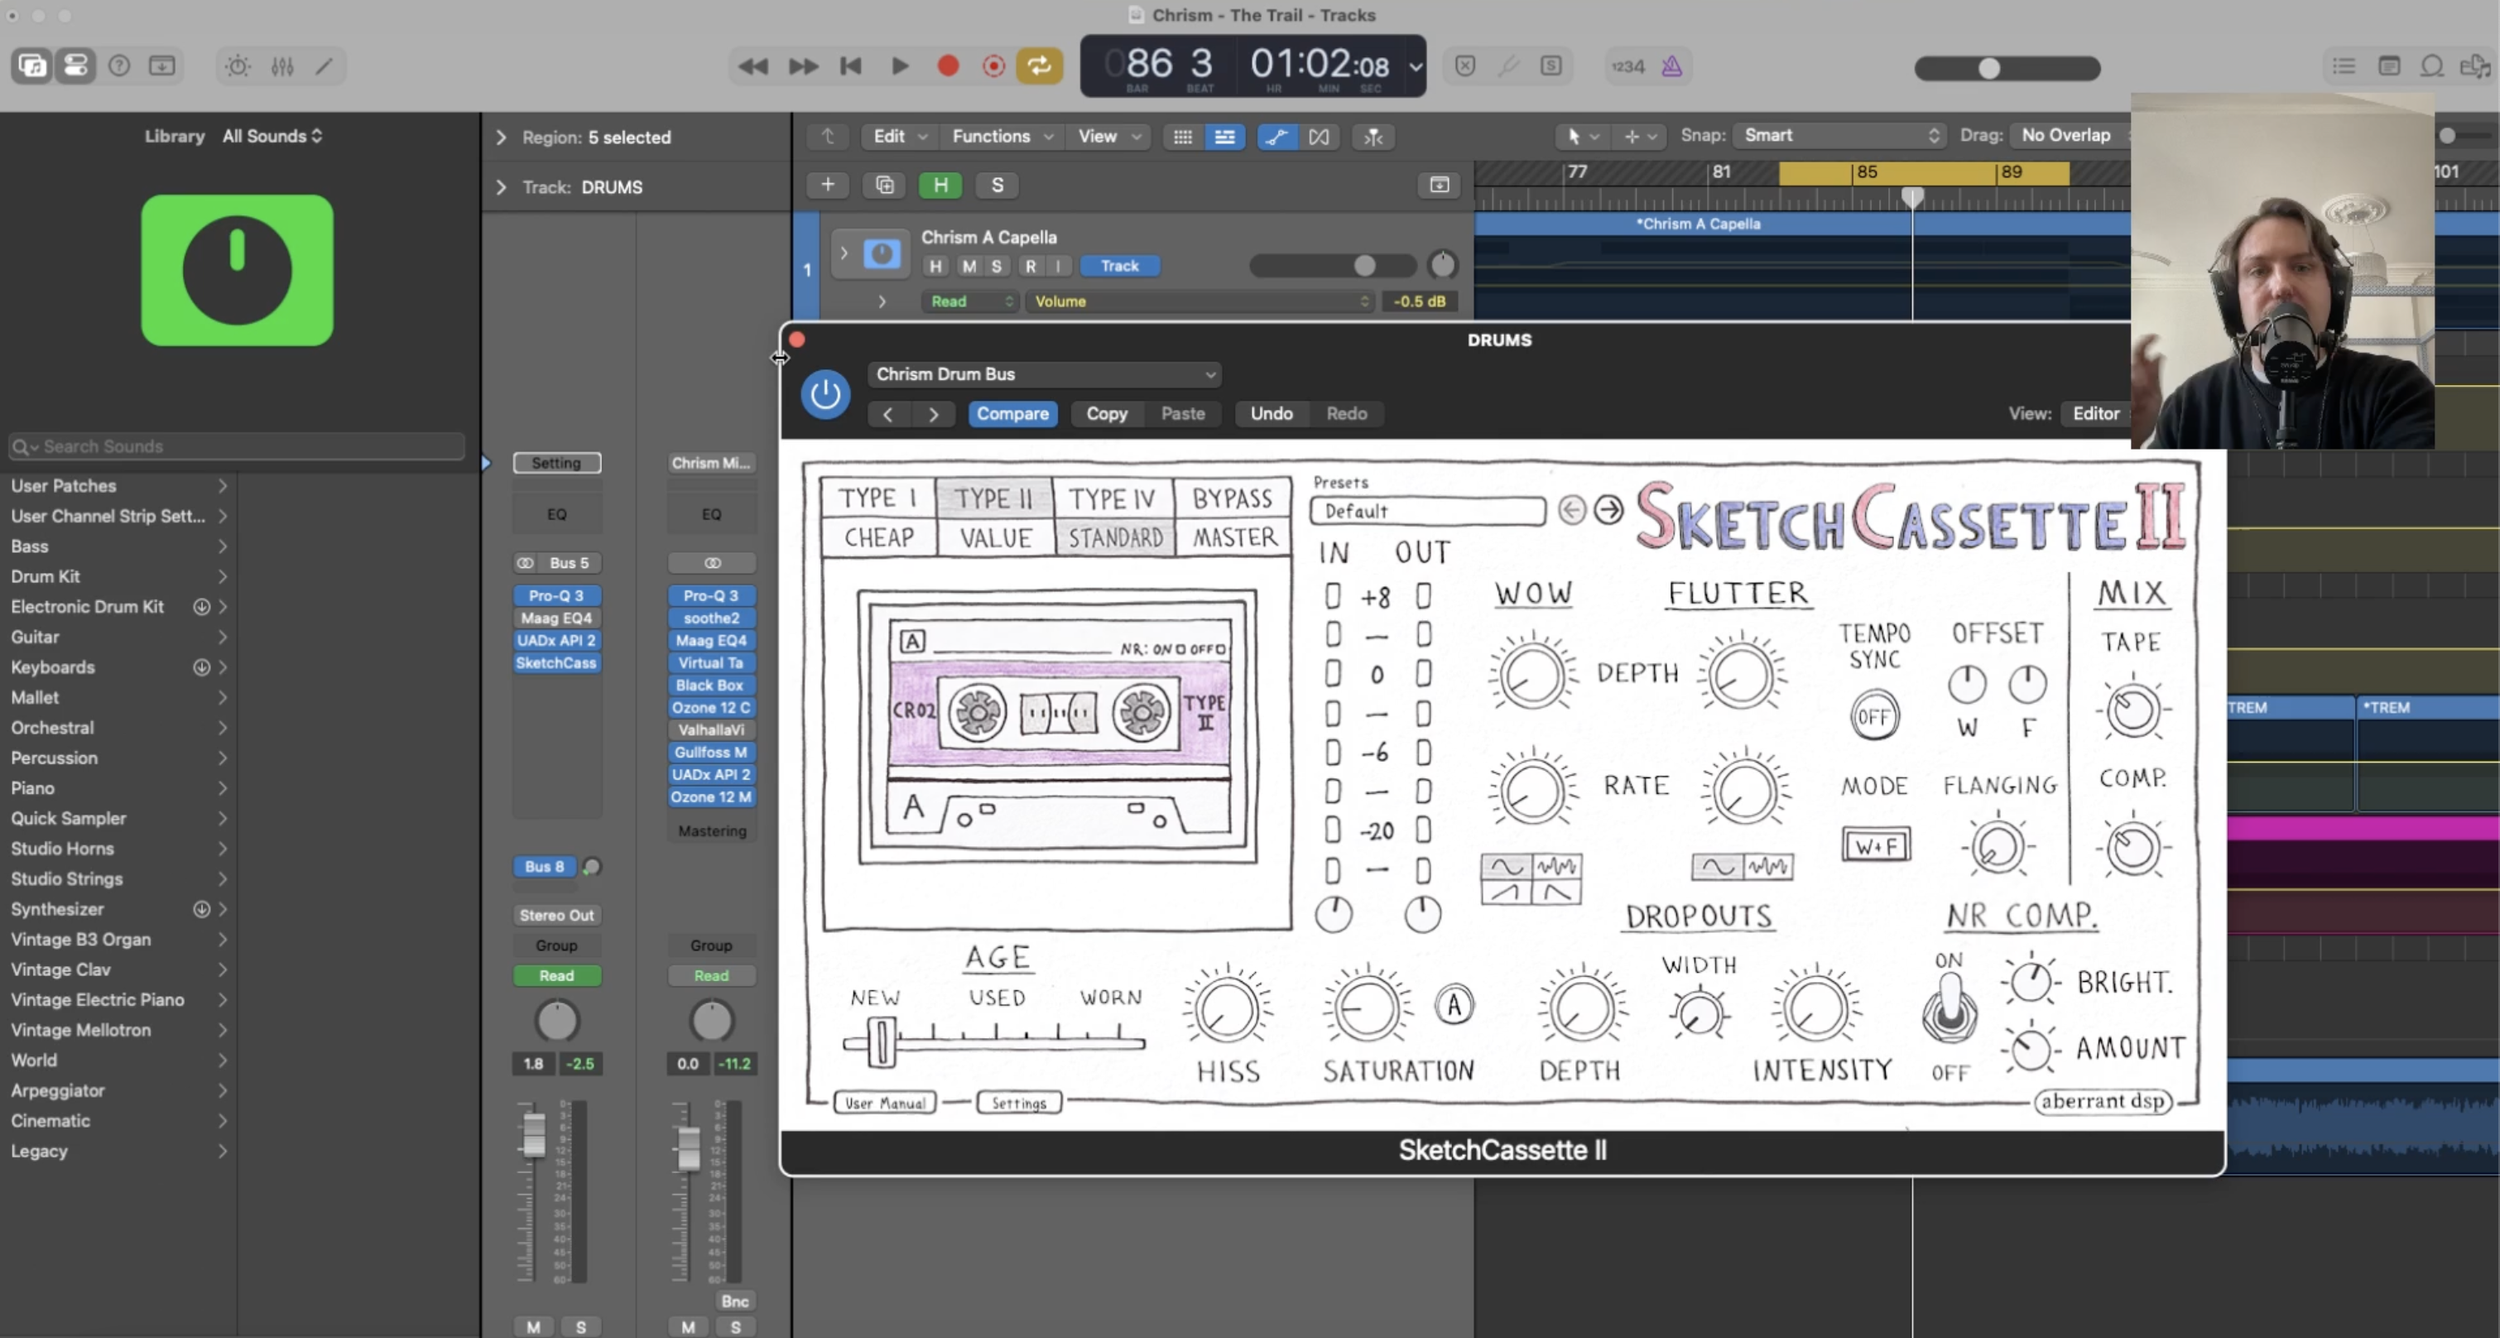
Put Sketch Cassette 2 on your drum bus and watch what happens. Tape saturation accentuates the crack of the snare, adds sheen to the cymbals, and gives the whole kit a sizzle that pops it out of the mix.
Here are the settings I like.
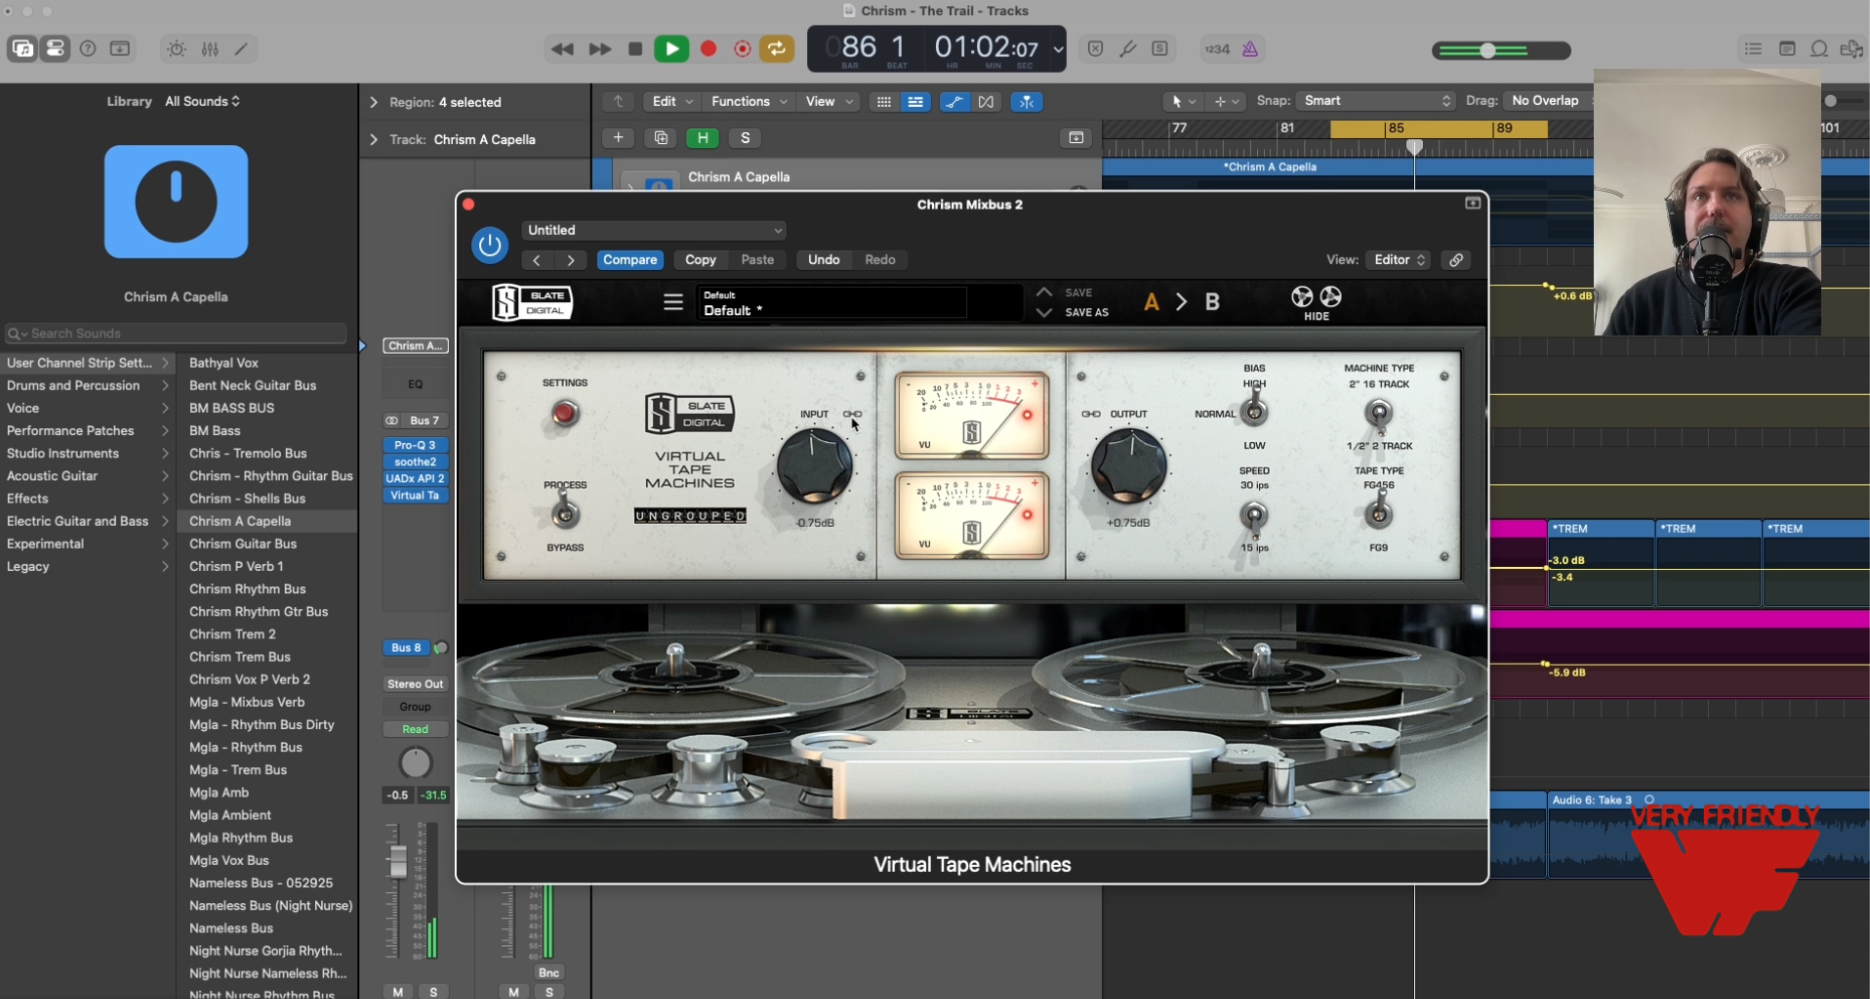
On the Mixbus: Definition and Beef (Slate VTM)
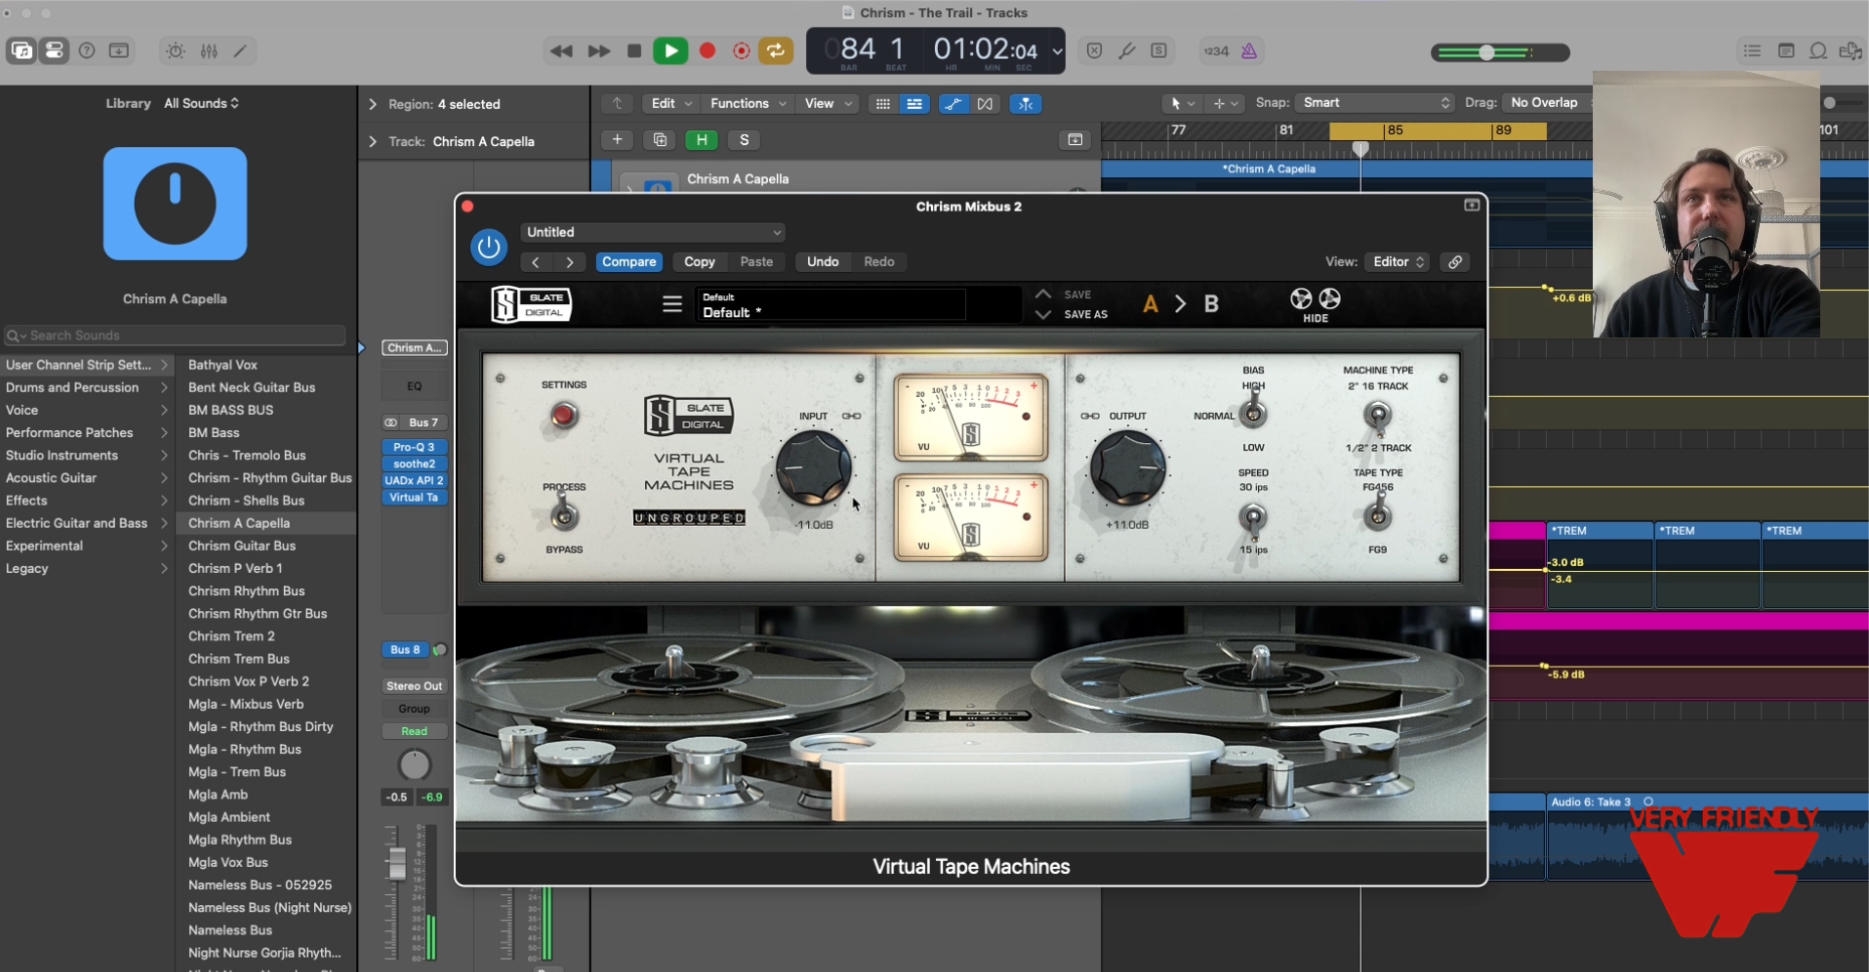
This is where VTM really shines. On the master, I use the British machine at 15 IPS for its smooth, warm character. The bass align setting beefs up the low end without getting boomy, and the subtle saturation adds definition to the mids that makes everything feel more finished.
Or Just Clip the Hell Out of It
Sometimes you want destruction. Crank the saturation and absolutely demolish your audio. It sounds great for some things, like room mics, parallel guitar or drum bus, or the whole mixbus if you want to have fun with it.
I love tape saturation.
You should use it everywhere.
To see a walkthrough of the settings check the video out here.